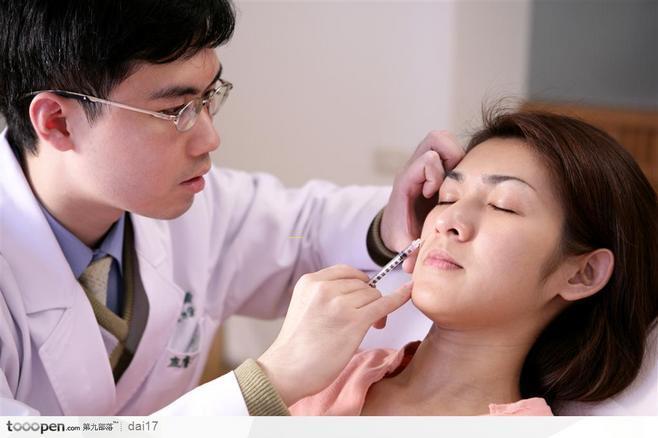
Title: Unleashing the Magic of Photoshop: Tips for Spot Removal, Skin Smoothing, and Whitening
Introduction:
In the age of social media and digital imaging, the desire for flawless skin is more prevalent than ever. Luckily, Adobe Photoshop (PS) provides a variety of tools and techniques to help enhance o* nat*al beauty. In this article, we will explore how to effectively remove spots, *ooth skin, and achieve a bright, radiant complexion.
Spot Removal:
1. Start by opening yo* image in Photoshop and creating a new layer. This allows you to make changes without permanently altering the original image.
2. Select the Spot Healing Brush Tool (J) and adjust the brush size according to the size of the blemish. Simply brush over the spots or acne marks, and Photoshop will automatically blend and replace them with s*rounding skin tones.
Skin Smoothing:
1. Create a duplicate layer to work on. This allows you to compare the before and after effects.
2. Select the Clone Stamp Tool (S) and set it to a low opacity (around 30%). Sample a nearby clean area by holding Alt and click, then lightly brush over the uneven text*e or wrinkles to soften them.
3. Another effective method is to use the Filter > Bl* > S*face Bl* tool. Adjust the radius and threshold until you achieve a *ooth, nat*al-looking result.
Whitening:
1. Again, create a duplicate layer to work on.
2. Go to Image > Adjustments > Levels. Slide the white point slider to the left, brightening the overall image. Beware of overdoing it, as it can lead to an unnat*al appearance.
3. To target specific areas, use the Dodge Tool (O). Set it to a low expos*e and carefully brush over dull or dark spots. This tool brings out the highlights, effectively brightening those areas.
Conclusion:
Photoshop is a powerful tool that can help us achieve a flawless complexion. By following the techniques mentioned above, including spot removal, skin *oothing, and whitening, you can unleash the magic of Photoshop and enhance yo* nat*al beauty. Remember, moderation is key; strive for a nat*al and realistic outcome.
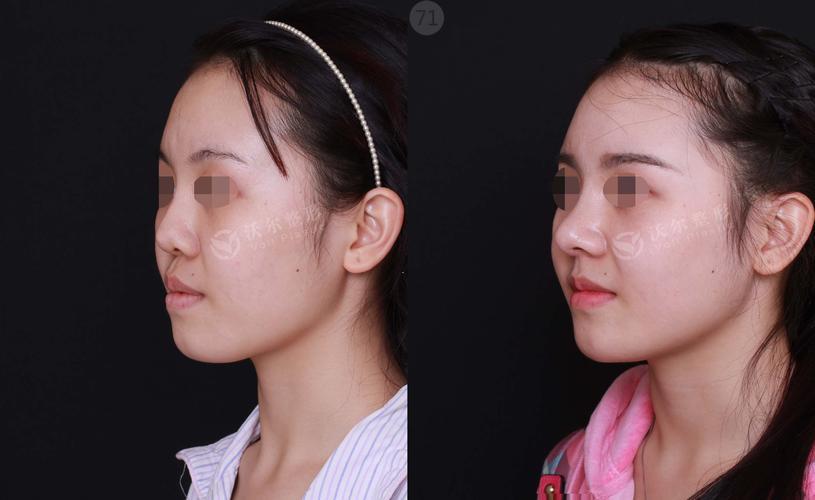
Caption: Photoshop's tools and techniques allow for effective spot removal, skin *oothing, and whitening.
在当今社会中,越来越多的人开始关注自己的肌肤问题,其中祛斑磨皮成为了众多美容需求之一。而随着科技的发展,人们可以通过一些专业的软件如Photoshop 2020进行祛斑磨皮的步骤。
打开Photoshop 2020软件并导入你想要处理的照片。然后,使用选择工具选中面部区域,以便稍后对斑点进行处理。接下来,进入“滤镜”菜单,选择“磨皮”功能,可以根据个人需求和肤质选择磨皮的程度,并点击“确定”进行处理。
在进行磨皮之后,可能会发现面部的斑点并没有完全消失。这时,可以使用修复工具,如*工具,将斑点周围的肤色进行修复,使其与周围肤色融合。同时,还可以使用调整图层功能来调整整体的亮度、对比度和色彩饱和度,以达到更自然的效果。
进行图片的导出和保存,可以选择常见的图片格式如JPEG或PNG。当然,在处理完照片后,也可以对比处理前后的效果,以便更好地了解祛斑磨皮的效果。
Photoshop 2020为我们提供了高效且专业的祛斑磨皮工具,让我们能够在自我美容的道路上更加得心应手。然而,正如任何美容技巧一样,我们应该保持理性理解美丽的含义,并尽可能选择自然、健康的美容方式。
标题:揭秘PS祛斑磨皮美白的效果与技巧
随着社交媒体的兴起,人们对于自己的外表美丽的追求更加强烈。而PS软件作为一款功能强大的图像处理工具,被广泛应用于美颜照片的编辑中。那么,如何使用PS软件来达到祛斑磨皮美白的效果呢?
图片选择至关重要。在使用PS软件进行美颜处理之前,选择一张高清、自然的照片非常重要。原始照片质量的好坏对于后续处理的效果有很大的影响。
使用“美容液”工具。在PS软件中,美颜处理可以通过“美容液”工具实现。使用此工具可以轻松祛除斑点,并调整皮肤的光滑度。但需要注意的是,过度使用会导致肤色不自然,因此要掌握好使用的程度。
另外,利用“图层”功能来实现局部美白效果。可以通过*原图层、添加图层蒙版等来实现局部美白,使得效果更为自然。
此外,色阶调整和曲线调整也是增加照片美感的绝佳方式。调整画面的亮度、对比度和色彩平衡,可以使图片更加立体、生动。
要想在PS中实现祛斑磨皮美白效果,需要细致的调节与处理。同时,作为一个整形知识博主,还是应该提倡自然美与美丽的内涵为主。美颜处理只是提升自信的一种方式,真正的美依然来源于内心的自信和积极向上的心态。
PS软件可以帮助我们改善肤色及瑕疵,但仍要记住珍爱自己的原貌,塑造一个健康有自信的形象。
PS祛斑美白磨皮的步骤可以帮助我们在照片中消除斑点,提亮肤色,使肌肤更加细腻光滑。以下是简单的步骤:
打开Photoshop软件,并导入你想处理的照片。然后,使用修复画笔工具或修复修复块工具,选择适当的画笔大小,轻轻刷去肌肤上的斑点。这个工具可以帮助你快速清除瑕疵,还原肌肤的整洁度。
接下来,使用磨皮工具来修饰肌肤细节。调整工具的强度和半径,轻轻刷过肌肤部分,使其看起来更加光滑。注意不要过度使用,以免磨去肌肤的细节。
然后,使用曲线工具来提亮肤色。调整曲线使图片的阴影和高光更加平衡,使肌肤看起来更有光泽。同时可以适当调整色彩平衡和饱和度,让肌肤看起来更加健康。
使用修饰工具来修饰肌肤细节,并涂抹适当的润肤霜效果,使肌肤看起来更加自然。
通过这些步骤,你可以轻松地实现照片中的祛斑美白磨皮效果,让肌肤焕发出健康亮丽的光彩。